Toteometer
RGB color mixer, inspired by totems
Role Physical interaction design, sensor programming
Tools Arduino, C++, Processing
Links Github
Jan – Feb 2024
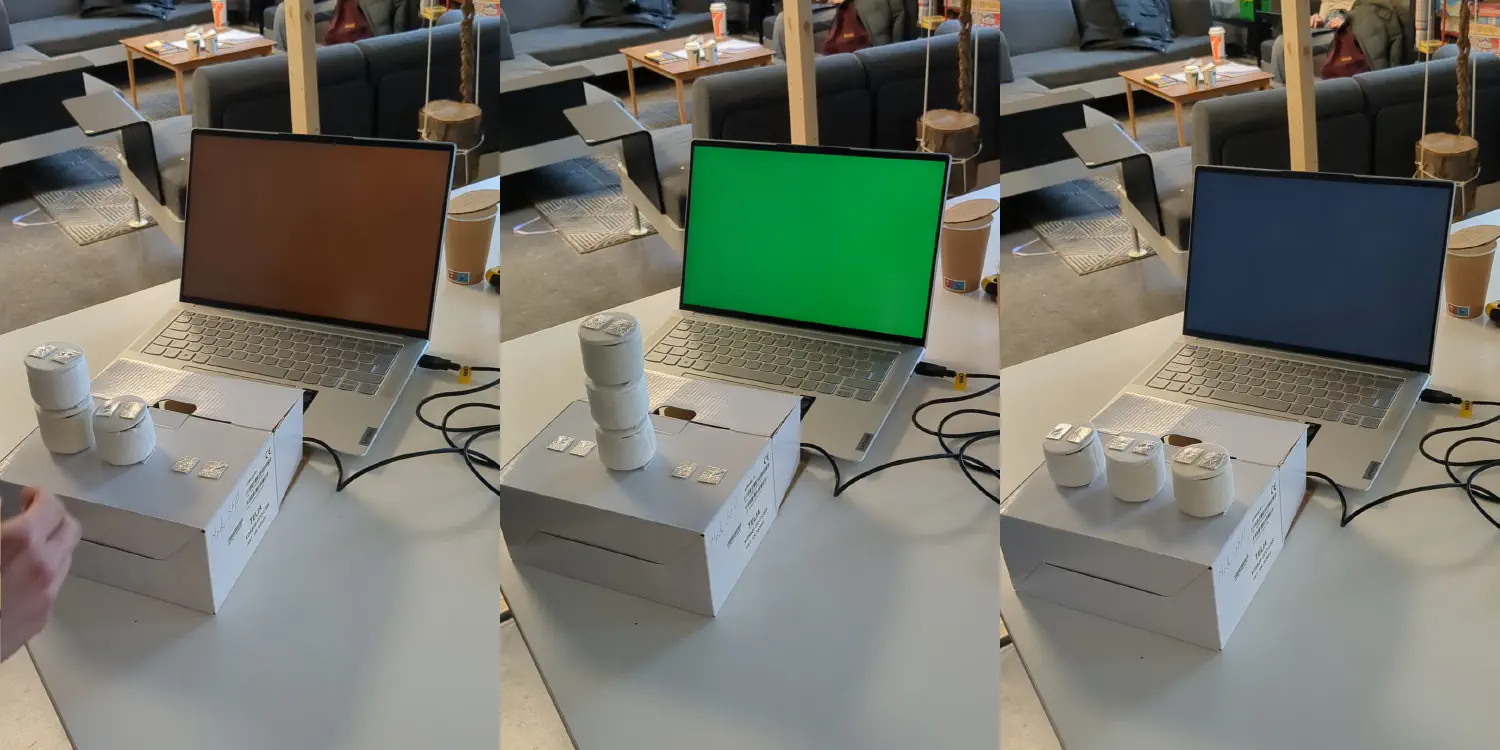
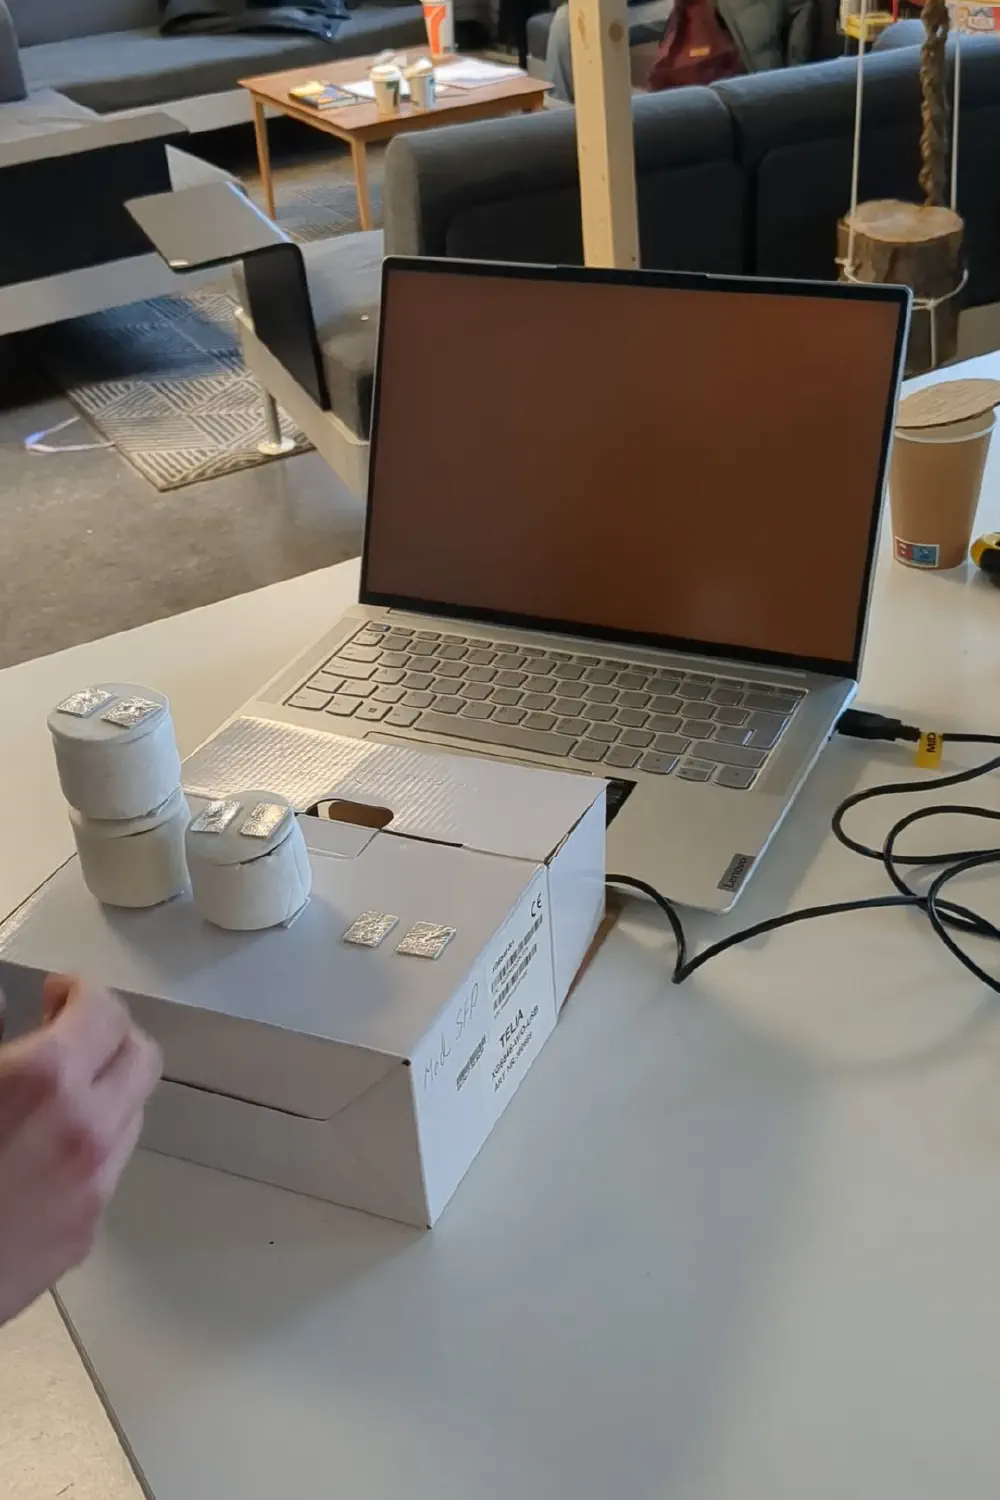
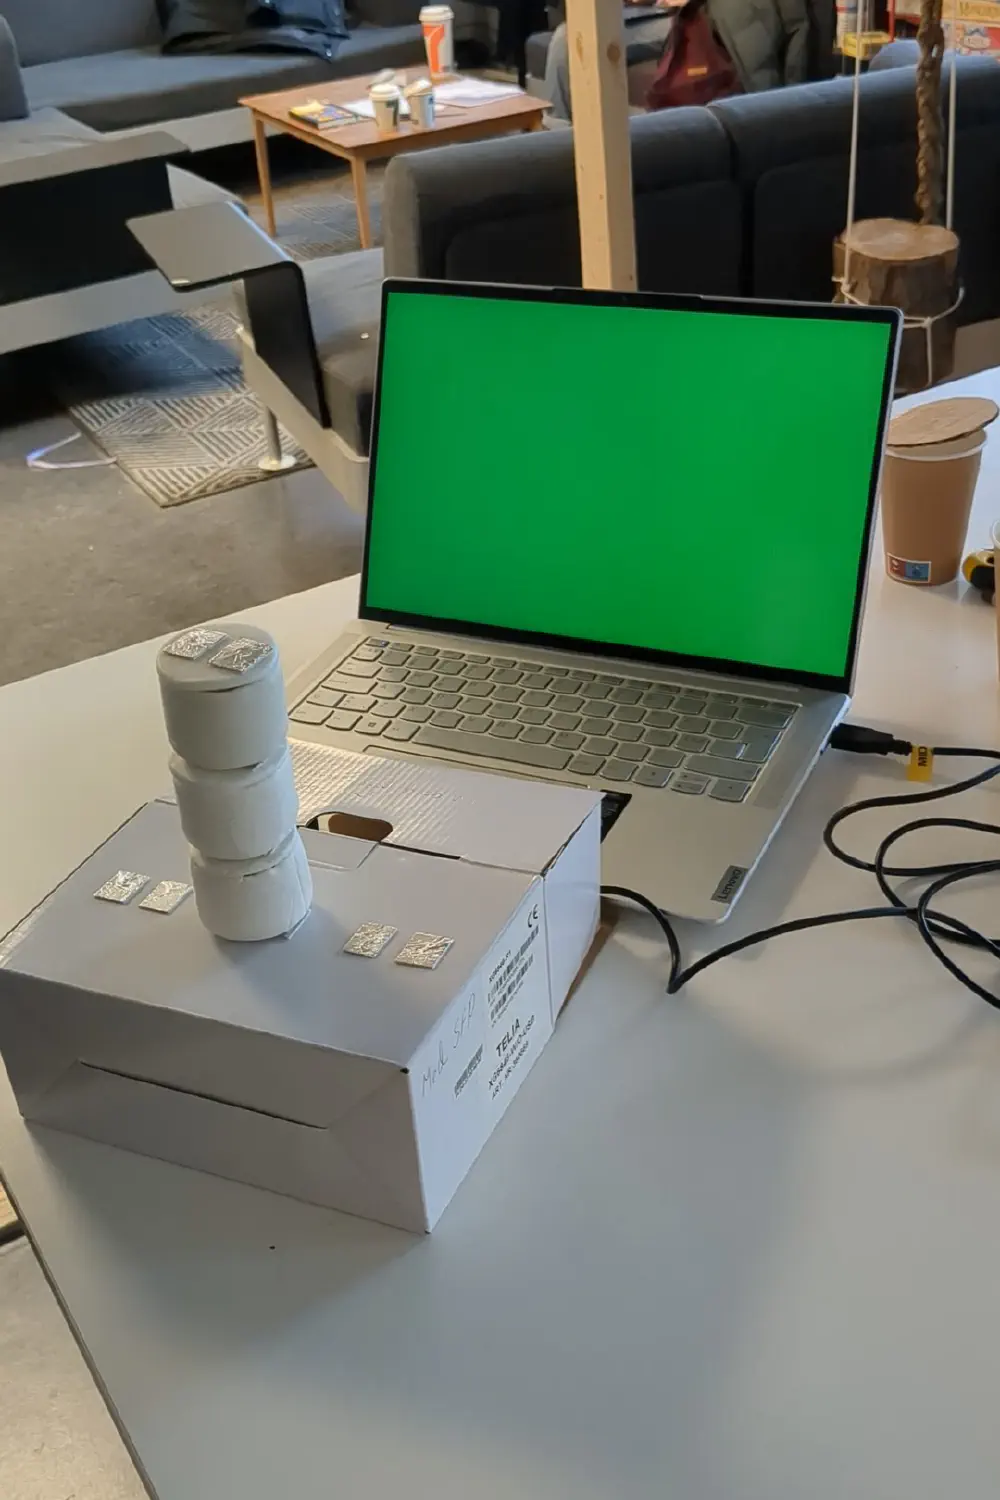
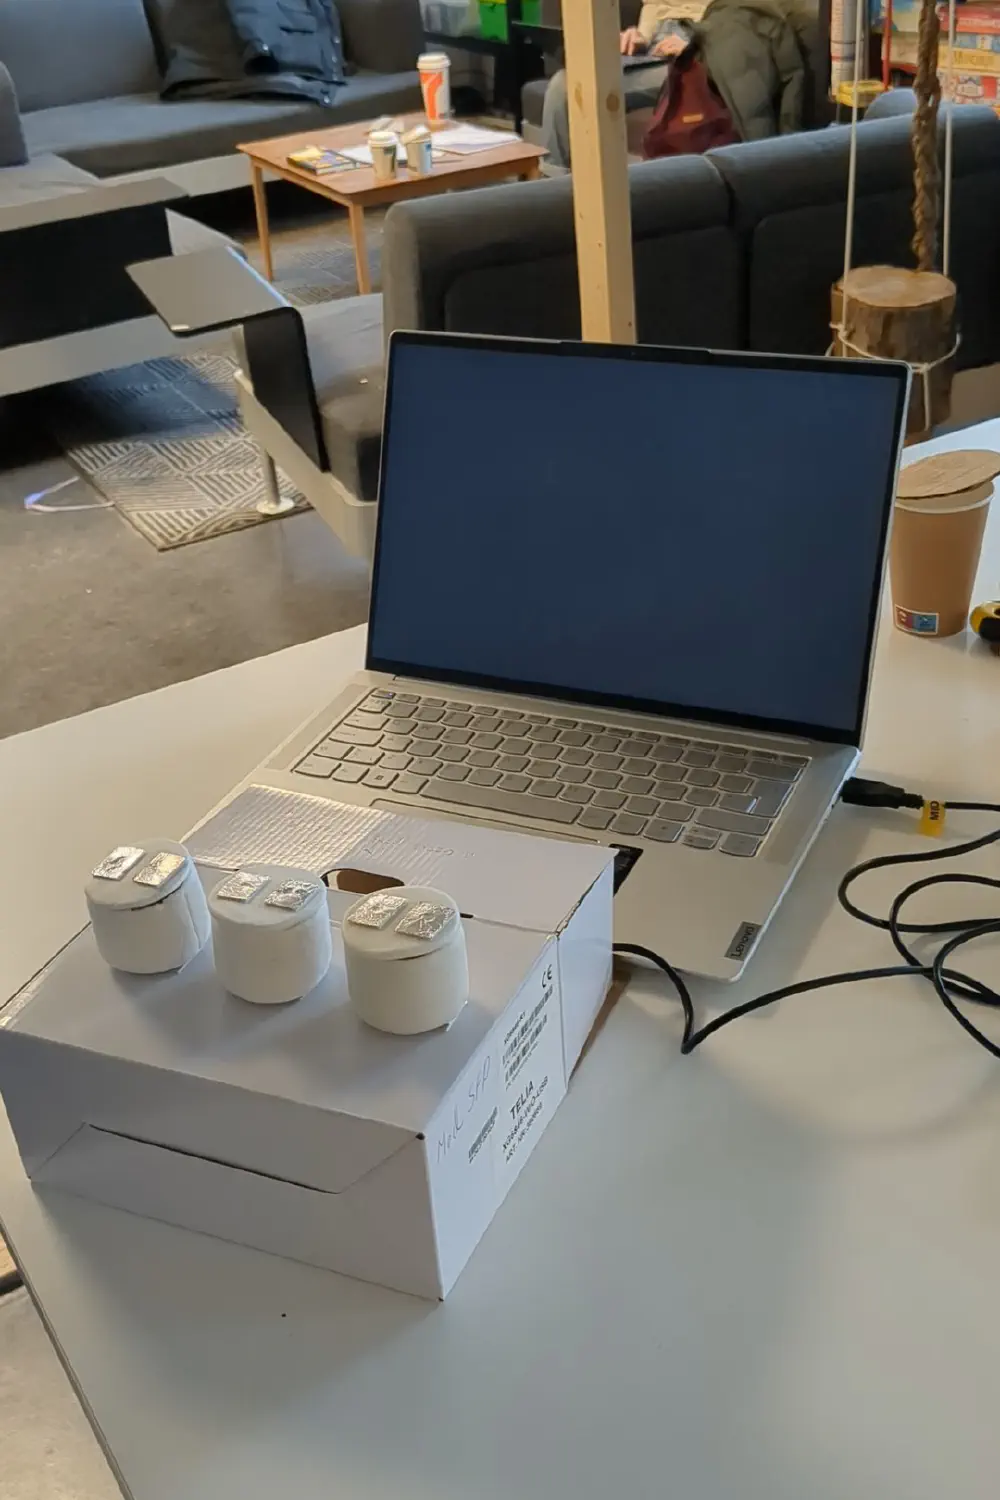
Totem parts are stacked to form totem poles. There are three spots where a totem pole may be raised, corresponding to the primary colours red, green, and blue. Depending on how many totem parts are stacked in each pole, a resulting colour is displayed on the computer screen.
The user explores the (usually pretty unintuitive) RGB and HEX colour space in a tangible and discrete way, which allows for experimentation and building embodied understandings.
| | |
#A50 dark orange; #0F0 green; #555 dark grey
Vision
I would have liked to make the parts actually resemble totems, with the classic faces and wings and horns etc. from the original shamanic practices and popular media. This idea came from another project I’m working on – and exploring this adjacent design space has facilitated additional inspiration.


| |
Kia’palano totems, Vancouver
I would also make the affordances better, with something like the stud/anti-stud of Lego bricks, as can be seen in the sketches further down.
Modular figurine utilising studs and anti-studs
Solartotem
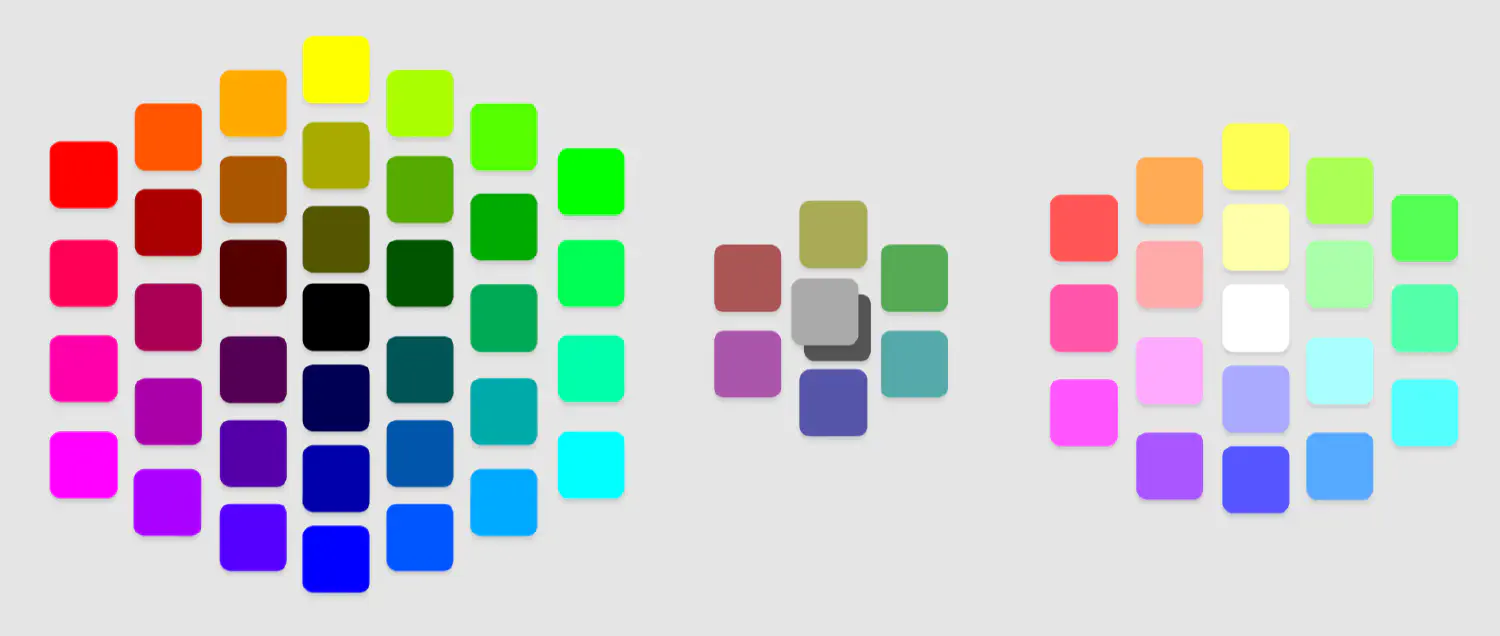
I used Processing to display the colours on screen, but the initial idea was to make it into a sort of lamp for ambient light. As such it would have been a playful decoration, lamp, and interaction, all in one. Though I only made three totem parts for the prototype, with nine it would be possible to map all colours in the quaternary palette:
Process
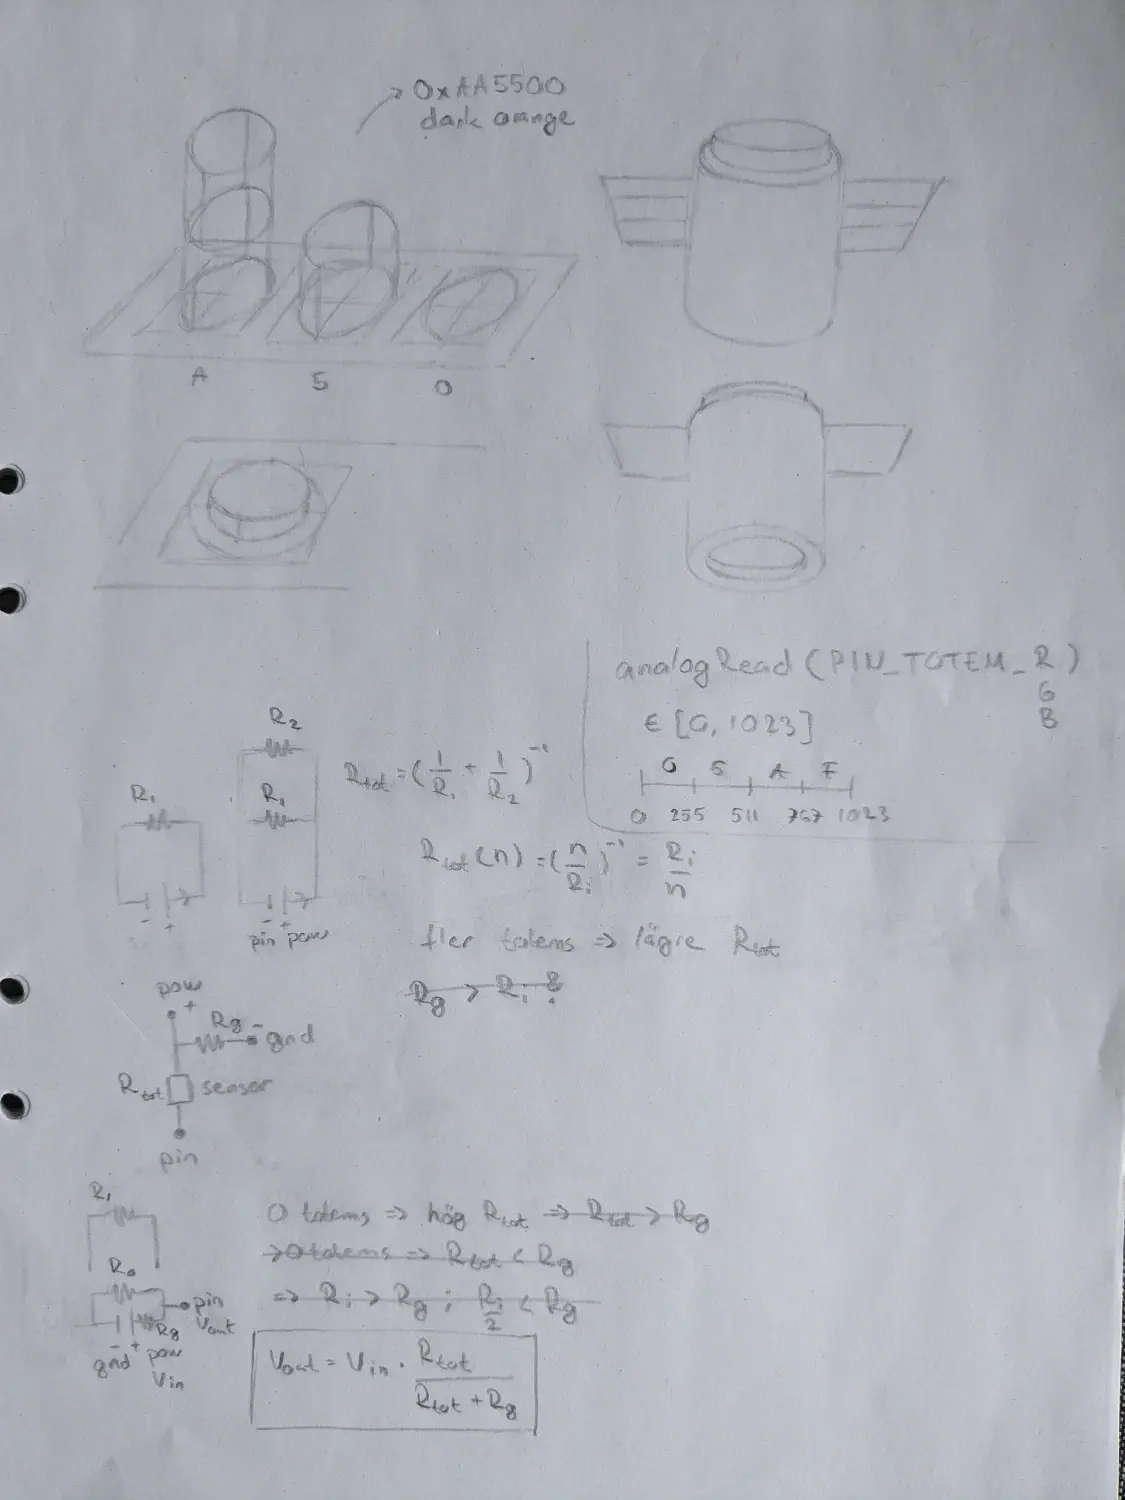
I started out with a brainstorming session and some background-level ideation over a couple of days. When I had decided upon an idea, I began sketching the general design:
| |
Next I had to figure out how the thing would actually work – at this stage I wasn’t even certain if it could work at all. And so I took to re-learning basic electronics and wiring, realised it could work, made a few failed attempts at sketching how it would work, finally got it right, and then tried it out in Tinkercad.
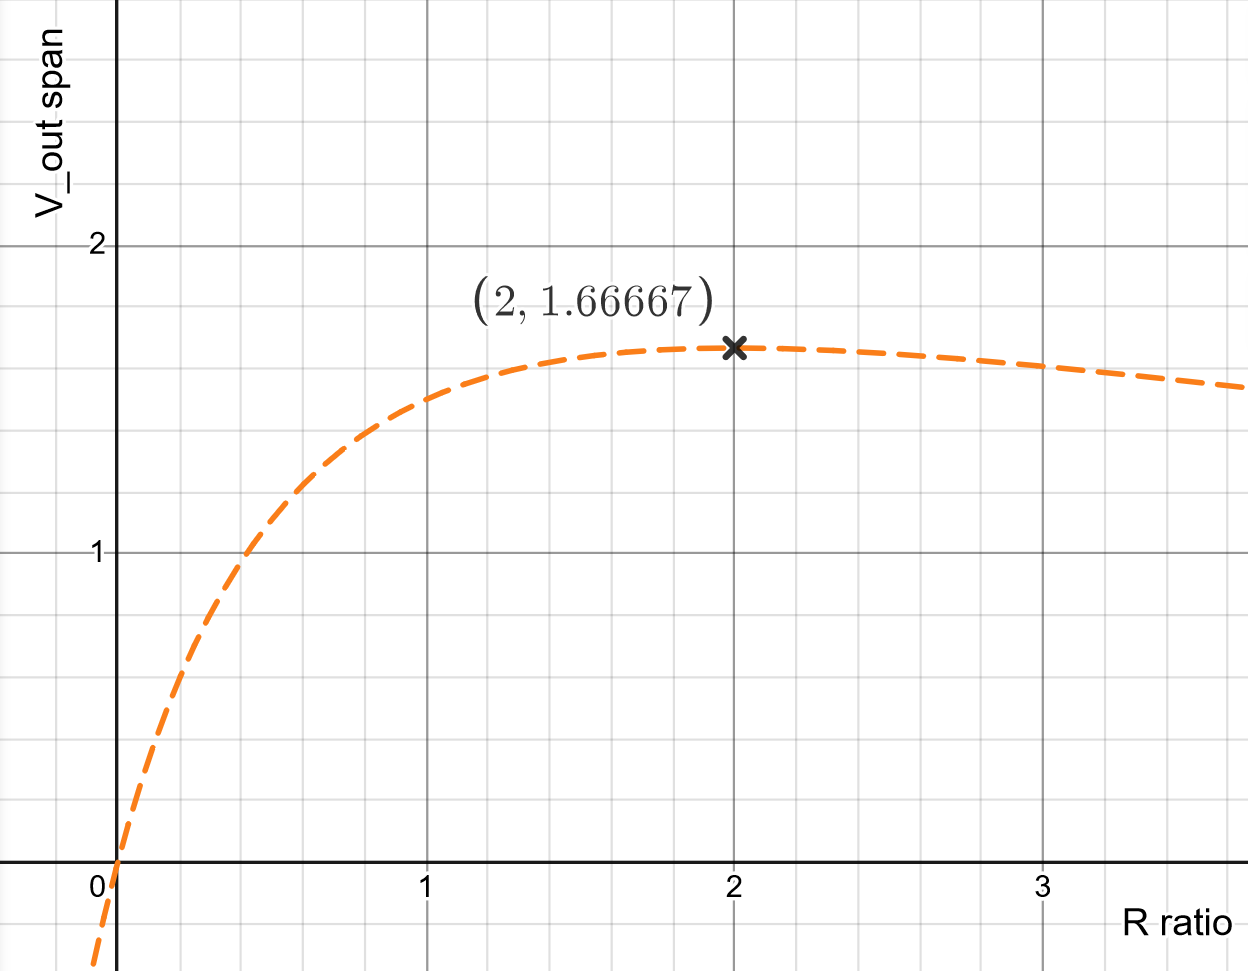
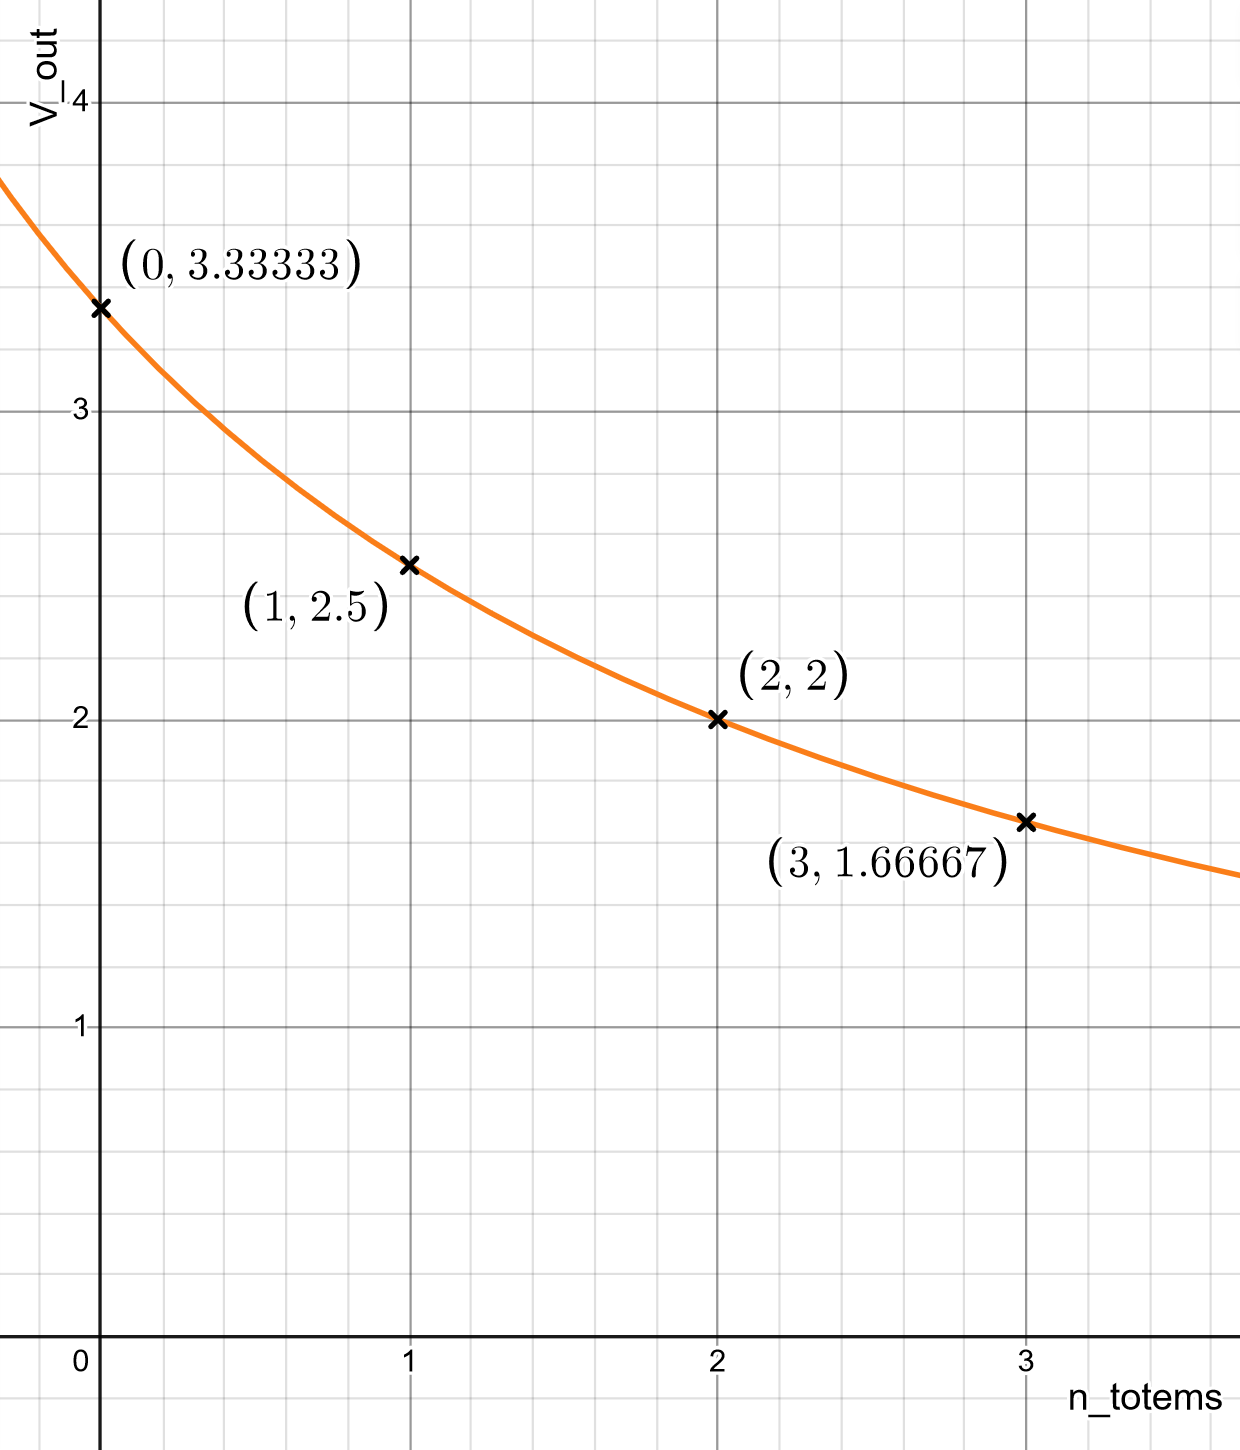
I also did the math to figure out the optimal resistances in order to maximise the output span and make calibration easier:
| |
Left: Signal output span as a function of the ratio between the resistances. Right: Signal strengths by all possible totem heights.
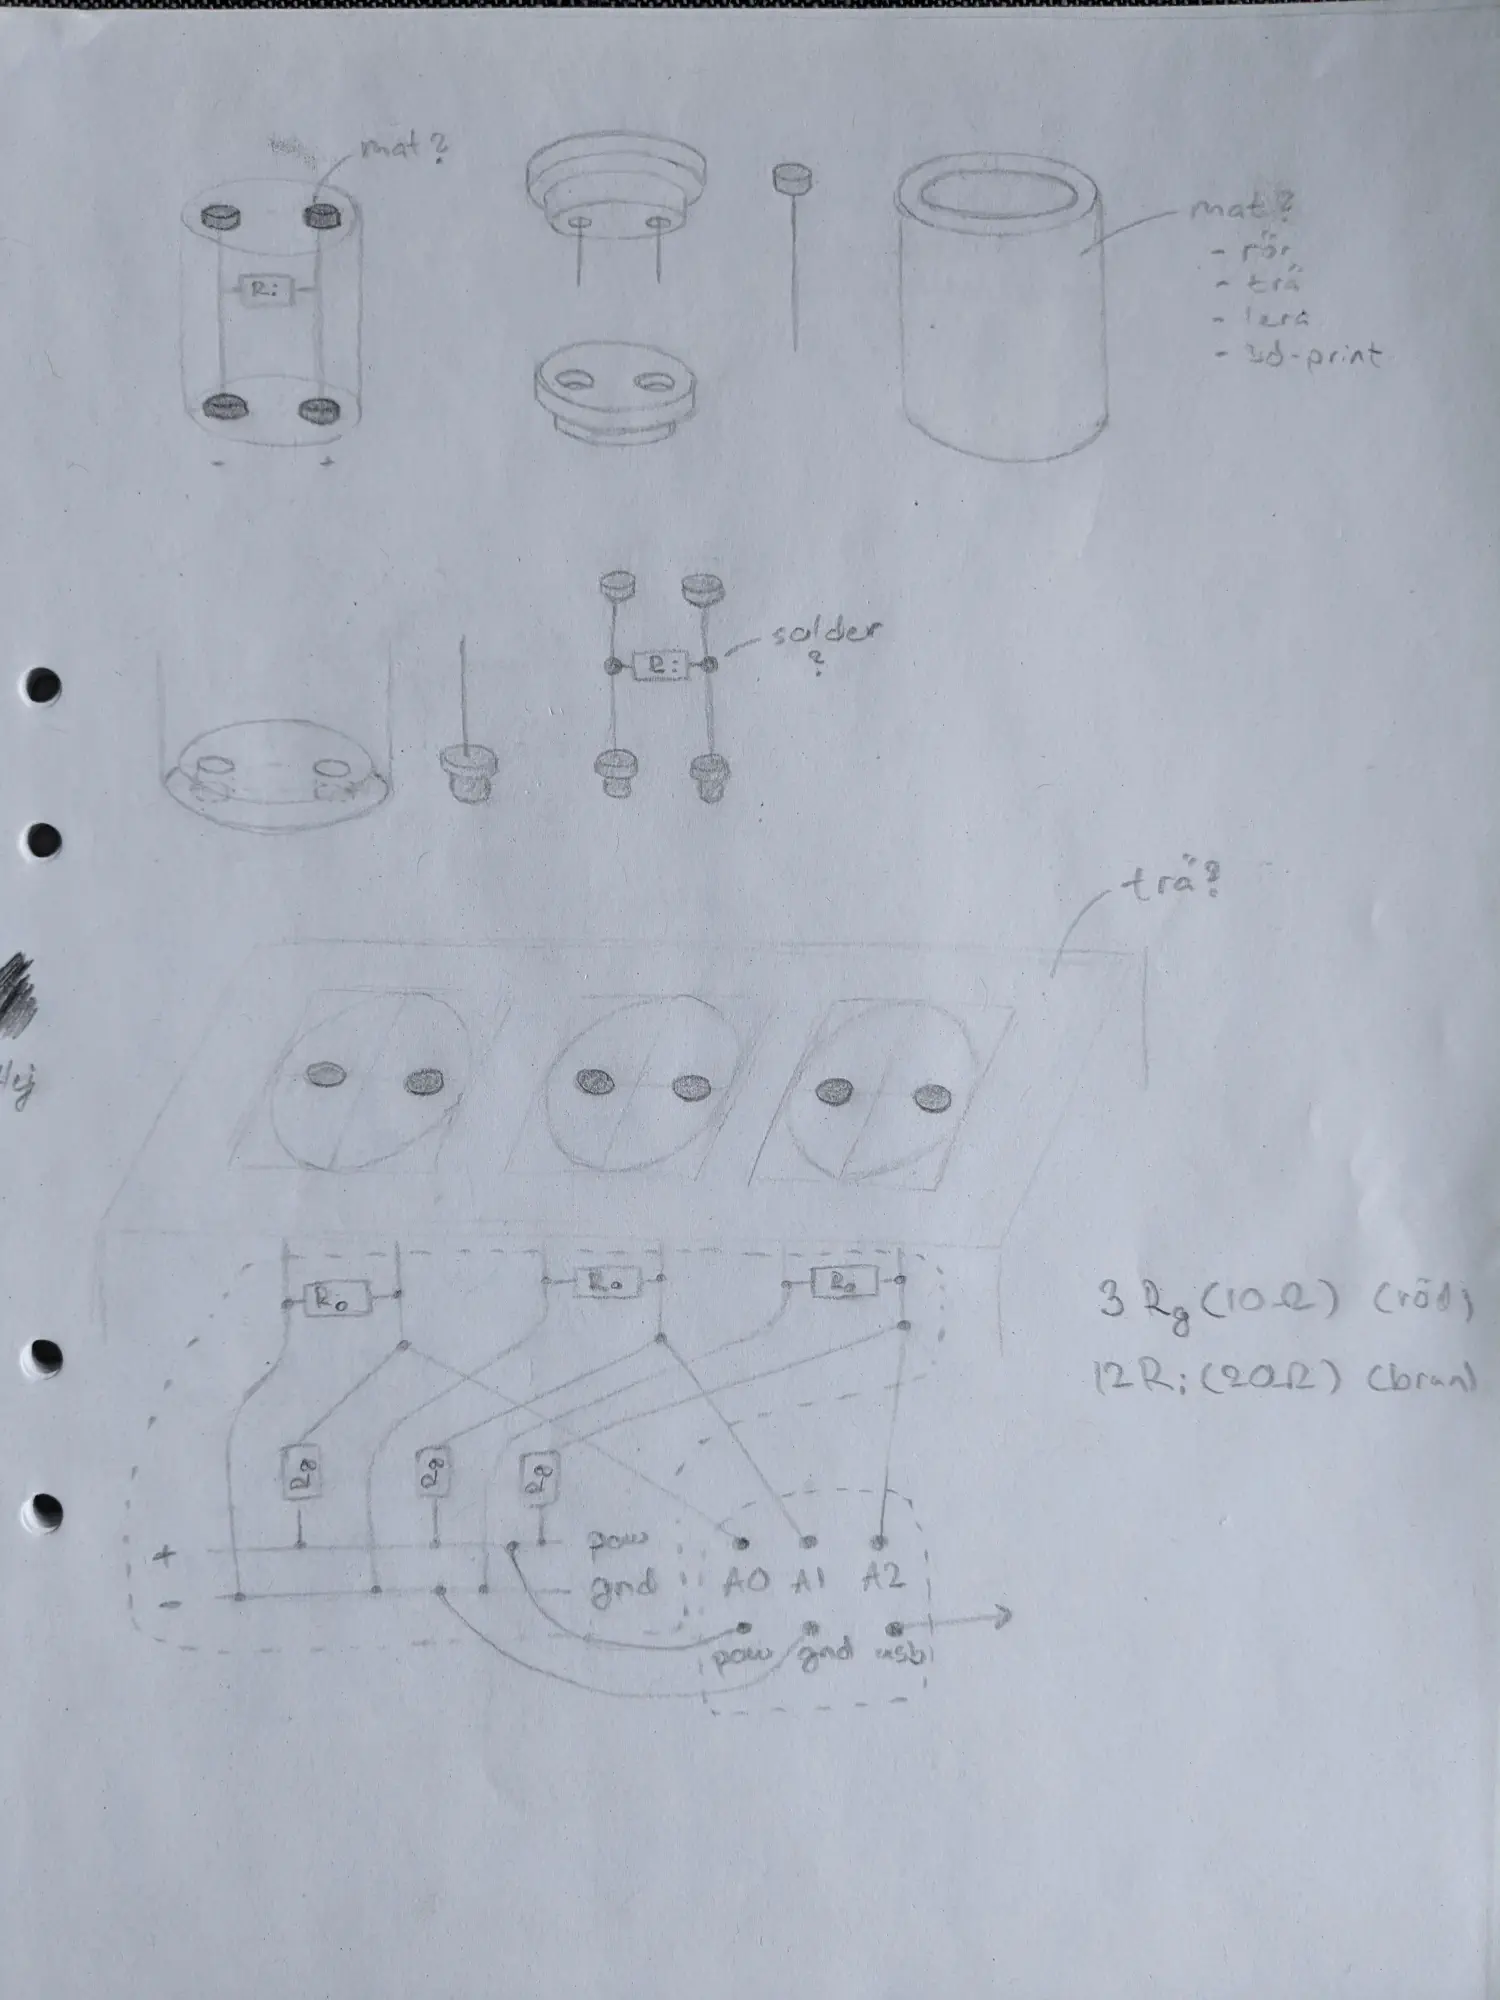
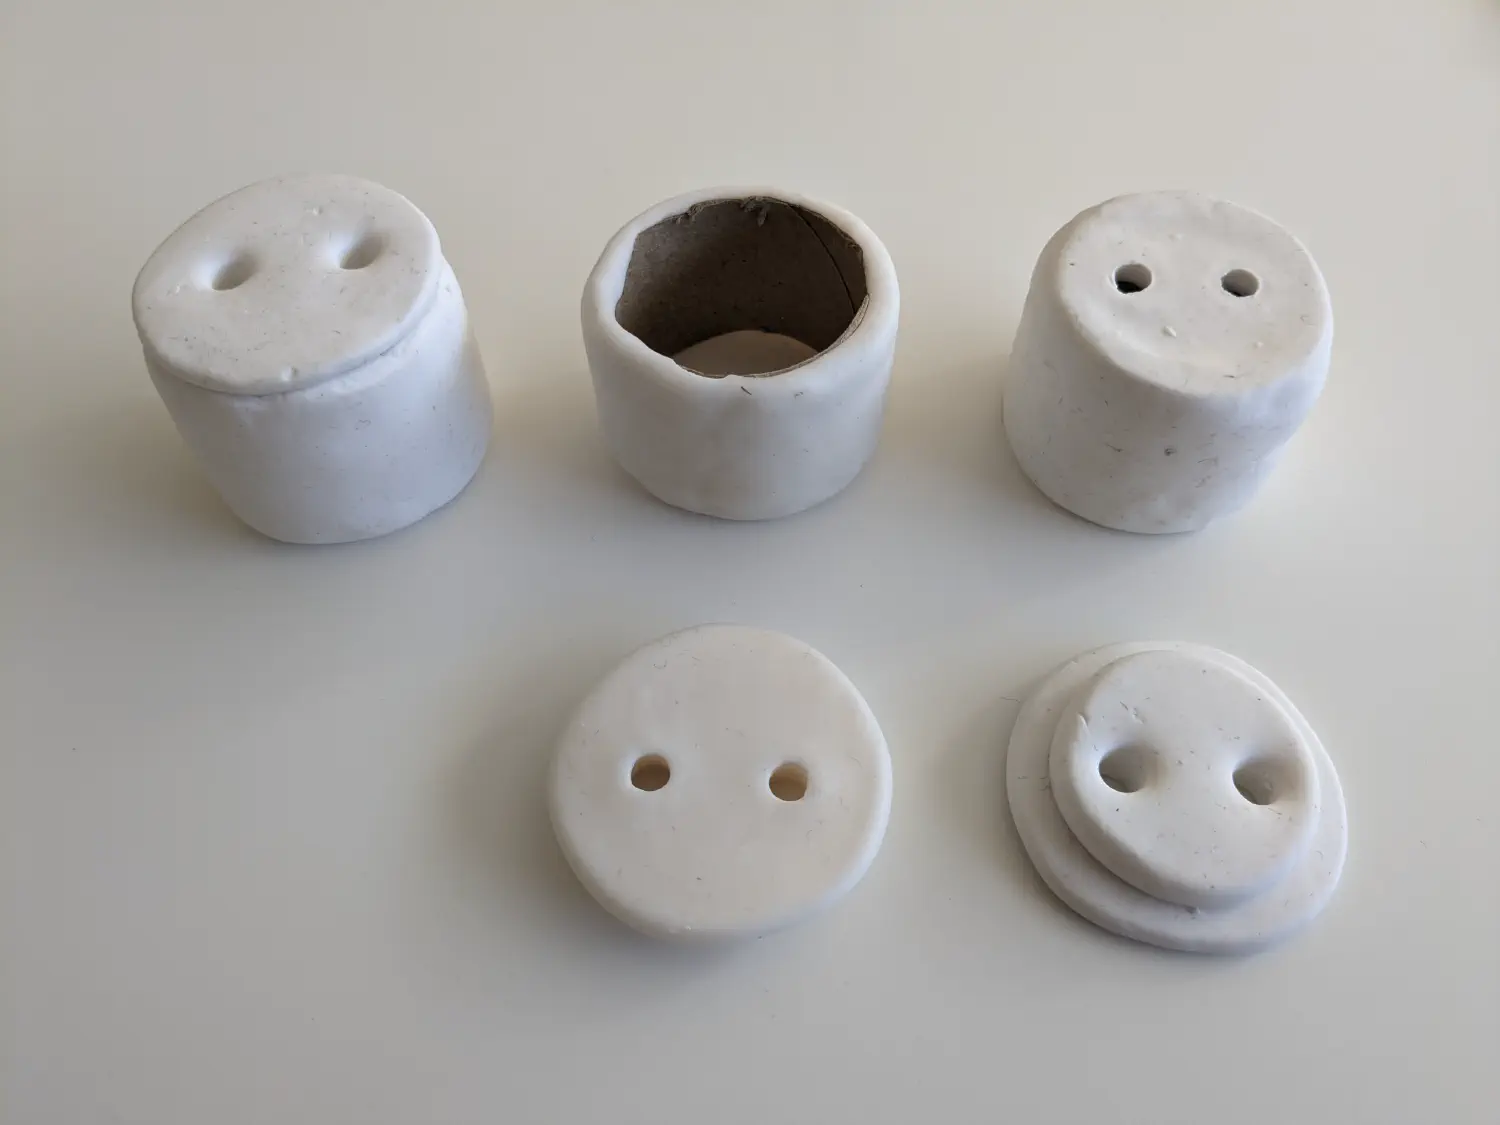
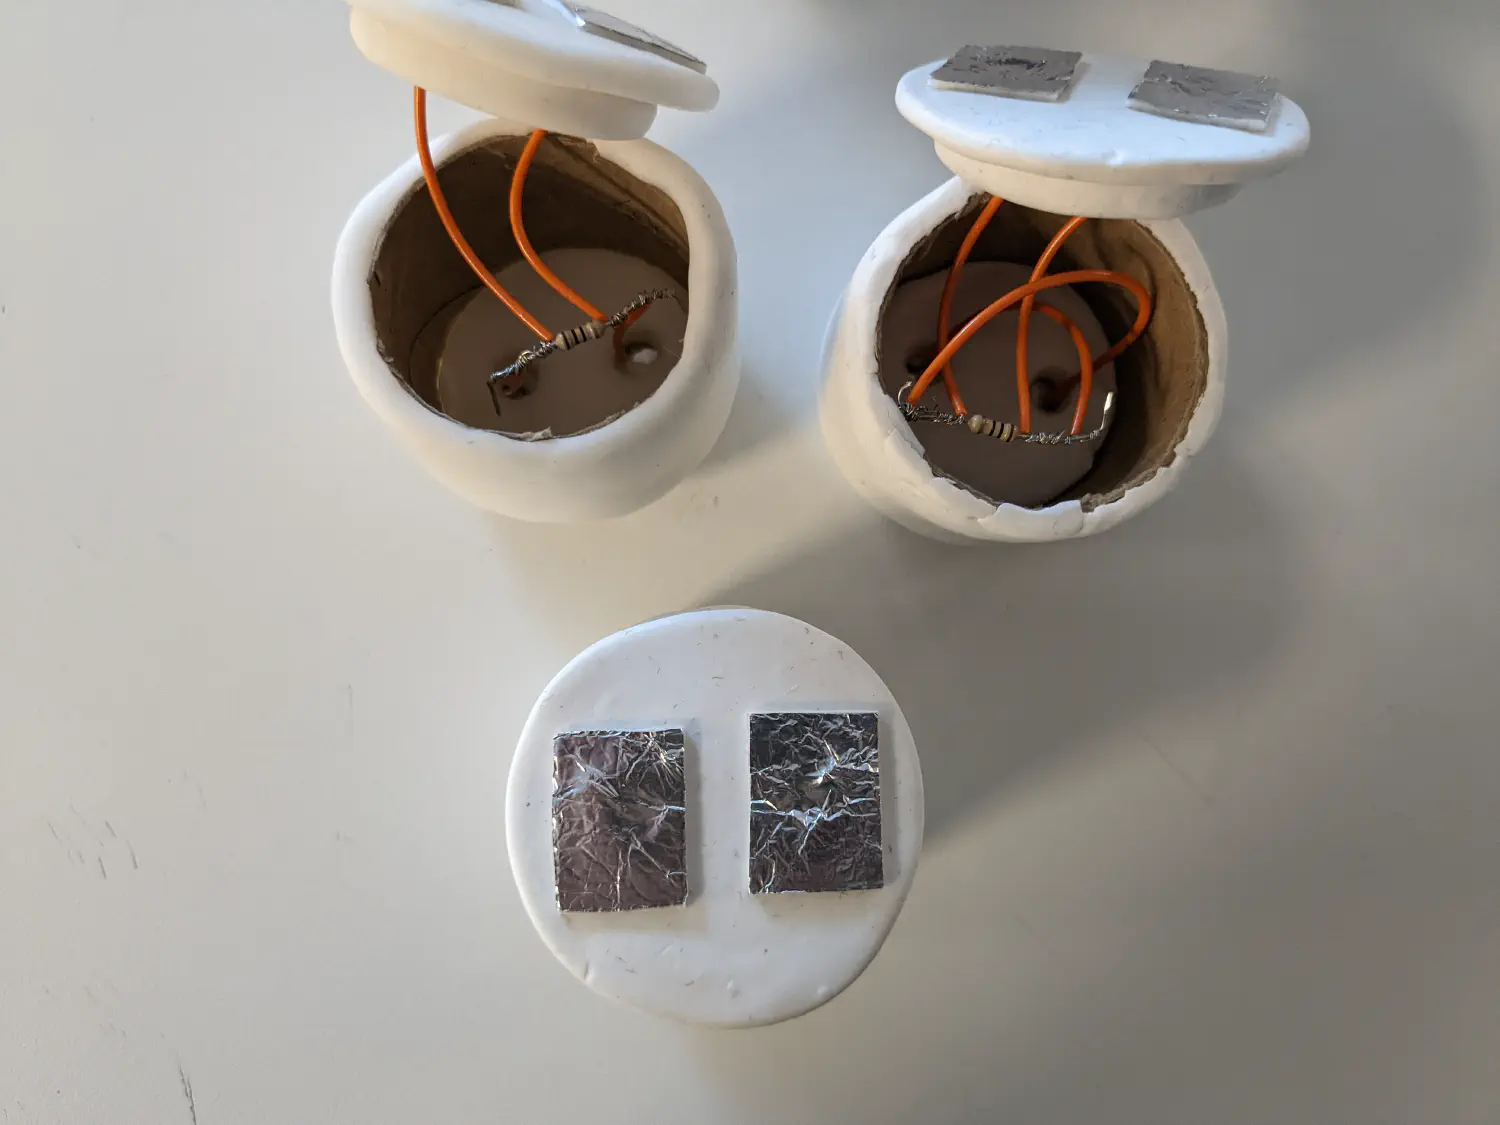
I made the totem parts out of Fimo clay and toilet paper rolls, then added wires, resistors, and aluminum as connectors:
| |